FOOD: Strawberry & Vanilla Mascarpone Tart

As we get closer to those warm, sun-drenched days of late spring and early summer, there's nothing I, Lauren, crave more than fresh fruit and lighter meals. One of my all-time favorite desserts is to eat fresh strawberries with vanilla mascarpone--in fact, our wedding cake six years ago was a modern-day take on strawberry shortcake, with layers of "naked" pound cake, mascarpone, and strawberries. 

I really love that combination. So for today's recipe, I thought I'd turn my favorite sweet flavors into super simple, individual tarts that you'll be wanting to make all summer. The recipe yields two servings, but you can easily double or triple it for sharing with friends! 

strawberry & vanilla mascarpone tartstrawberry & vanilla mascarpone tart

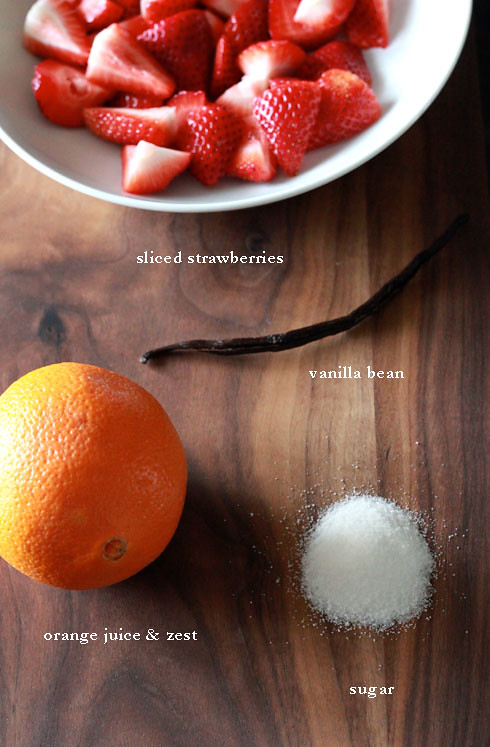
Macerating strawberries is really easy. Most people just use a bit of sugar and water, but I added orange juice and zest for a subtle citrus kick, and some seeds from a vanilla bean to pick up the flavor of the vanilla mascarpone. 

strawberry & vanilla mascarpone tart

Remember the spring tarts? I used the same frozen puff pastry for these tarts--that puff pastry is so versatile! In this case, I just added extra strips around the edge of each square to make higher borders for keeping the mascarpone, berries and brandy syrup inside.

strawberry & vanilla mascarpone tart

Ingredients
1 large handful strawberries, tops removed and sliced in half
1 tablespoon sugar
1 orange
1 fresh vanilla bean, split and seeds scraped
1 sheet of store-bought puff pastry, defrosted
1 egg yolk, lightly beaten
1/2 of a small container of mascarpone
2 teaspoons powdered sugar
1 cup water
4 tablespoons brandy
1 cup sugar

Instructions
1. To make the brandy syrup, place the water, brandy and sugar in a small saucepan over high heat and bring to a boil. Reduce heat to low and simmer 15 minutes or until the mixture thickens. Set aside and allow to cool.
2. To macerate the strawberries, place sliced strawberries in a bowl. Sprinkle with 1 tablespoon of sugar, juice and zest of an orange, and half the seeds from a vanilla bean pod. Mix it all together gently.
3. Preheat the oven to 400 degrees. Cut two squares from one sheet of pastry dough. Place on a baking tray lined with parchment paper. Cut 1/2-inch wide strips from the remaining pastry dough and place the strips around the pastry squares to form borders. Brush the tops of the borders with the egg, then bake for 15 minutes or until puffed and golden. Don't forget to pierce the middle of each square with a fork before baking, so they don't get quite as puffy inside as mine!

4. To make the filling, place the mascarpone, powdered sugar, and remaining half of the vanilla seeds in a bowl. Combine thoroughly with a fork. Set aside.

5. To serve, spoon the vanilla mascarpone into the tarts and top with the macerated strawberries. Finish with a little extra orange zest, and serve with the brandy syrup. Makes 2. 


-images and post by lauren craig

Google+ Pinterest

Series: My Home, My Space


What is your favorite area in your home and why?


"Hi this is Devon Rachel from Devon Rachel blog & I'm so happy to be participating in the first My Home, My Space series on MadeByGirl!
My favorite area in my home at the moment is definitely my bar (cart). After searching for what seemed like years, I finally found the cart and could not be happier with it! I love that it has additional storage space on the bottom shelf. I never have enough room in my home to store my things!


I'm a huge fan of displaying pretty trinkets, so it gives me a fun way to incorporate what I've collected over the years."


-images via devon rachel


Google+ Pinterest

Fashion: Staple Pieces

Hi guys!  Kat from With Love From Kat here.  The weather has been so gorgeous in NYC lately, all I've wanted to do is be outside.  I've been wearing this low maintenance look for meetings, lunch dates, and weekend outings.  It's so nice to have a handful of staple pieces that help you get dressed fast and still look put together.  

My #1 staple piece is an Equipment blouse.  You can get a silk blouse just about anywhere, but Equipment blouses are more tailored and flattering than others.  Have you seen the rainbow of colors they come in?  The turquoise one is on my wish list!  


-post by kat tanita


Google+ Pinterest

Design: Ways to decorate a powder room

Hi MadebyGirl readers!  Sam here, back to share more design inspiration with you!

I am currently in the process of creating a design plan for a client's powder bath, which is one of my favorite rooms to pull together.  It's easier to take design risks and do a bolder look when the space is smaller in scale.  Here are a few of my favorite ways to spruce up a powder room.

  1.) Adding a bold wallcovering is a must:


2.) In addition to wallpaper, I love monochrome powder bathrooms in a cheery color:


3.) Finally, adding little touches to a powder room can give it extra warmth and personality.  I love monogrammed hand towels, fresh flowers, and other small mementos:


Do you have a powder bath?  If so, what's your favorite way to spruce it up?


-post by samantha penner


Google+ Pinterest

Oba Arquitetura

Have you heard of Oba! Arquitetura? Two architects Leila Bittencourt and Fernanda Casagrande, opened up a showroom focusing on children rooms! They don't believe in designing a room around a specific theme rather developing each room as a work of art. They source accent objects from around the world, and use lots of texture and patterns to keep a playful and magical feel to each room. 

Leila and Fernanda also have their own line of furniture (tables, stools and beds) that they design in their studio, that they say can "grow" with the child, making sure that each piece is adaptable as they get older. Check out some of their work below! Aren't these rooms precious?


images above by Sambacine


- images by: Oba! Arquitetura
Google+ Pinterest

Mom's Day Sale at Made By Girl

Made By Girl is now having a Mother's Day SALE for 20% off! The sale expires May 12, 2013. MBG products only, frames not included. For delivery by mothers day, be sure to pick appropriate shipping.  

Your coupon code is MOMDAY2013 - feel free to tweet the discount code in case any of your friends may want to get something! Below are some of the beautiful pieces you can buy 20% off!


-images by jen ramos


Google+ Pinterest

FOOD: chocolate peanut butter molten cake

Hi everyone, it's Alison here from Heart of Gold and Luxury and today I am excited to share with you an ultra-indulgent recipe for Chocolate and Peanut Butter Molten Cake.  They say the way to the heart is through the mouth. I definitely believe that it true, but think that chocolate must be involved - rich, dark chocolate.  I love combining this decadent ingredient with coarse sea salt, hazelnut and my all-time favorite, peanut butter.  

When Jen requested that I make something with chocolate I jumped at the chance - a women after my own heart, a lover of chocolate!  This individual cake is a like eating a bit of heaven.  It has a moist and creamy interior thanks to the molten warm peanut butter and dark chocolate. This recipe is incredibly easy to make and will definitely be the star at your next dinner party - and don't be surprised if this becomes your signature dessert!

Chocolate and Peanut Butter Molten Cake

Ingredients:
2, 3.5 ounce dark chocolate bars (best quality), chopped
6 tablespoons unsalted butter, diced
2 eggs
2 egg yolks
1/2 cup sugar
1/4 cup flour
8 teaspoons creamy natural peanut butter
cocoa powder, for dusting

Special Equipment: Four 1-cup ramekins

Directions: Preheat oven to 400 degrees.  Combine chopped chocolate and butter into a heavy bottomed sauce pan over medium heat.  Allow for chocolate and butter to melt.  Meanwhile, combine eggs, egg yolks, sugar and flour. Slowly whisk in chocolate mixture.  Pour batter into ramekins and set atop a baking sheet. Add 2 teaspoons of peanut butter into the center of each ramekin.  Place into oven and allow to bake for 12 to 16 minutes.  Cake is done when top is slightly puffed.  Allow to cool for 5 minutes, then run a knife along the outside of ramekin to release cake and invert onto plate. Dust with cocoa powder if desired and serve immediately.  


*All photographs by Alison
*Recipe adapted from Donna Hay's Molten Peanut Butter & Chocolate Fondant Cakes


-post by alison dulaney


Google+ Pinterest

SOHO HOUSE NEW YORK

Have you ever heard of SOHO House? It was founded in London as a private members' club in '95, but now there are SOHO Houses across Europe and North America. Of course, one location being New York City. SOHO House NY is a private members club in the Meatpacking District in Manhattan. The facilities offered are countless, the Restaurant, Club Bar, Drawing Room, a private cinema, a heated rooftop pool.. just to name a few. 
 
 But to reserve a room, you have to be a member, and yes, there's an application process to become a member along with an annual fee. Now, I'm dying to go there & stay a couple nights....ahhhh


-images by: SOHO House NY


Google+ Pinterest

Fashion: how to wear a graphic shirt

 photo madebygirl1_zps714b69be.jpg

 Happy Monday! its Carlinn here from Superficialgirls. With the changing of seasons in full gear there is one item of clothing that I have been finding so versatile. A cute graphic jumper can be worn with a skirt or jeans for day or night with or without a jacket and there are so many you can buy at the moment.

I just love how Blair Eadie from Atlantic Pacific dressed hers up. Adding a shirt underneath makes it less casual and pairing it with a cute flared skirt and some statement shoes makes this outfit perfect for the office or a date.

1. Karen Walker super duper strength sunglasses
2. Asos Bonjour sweater with stripes
3. Topshop black full skater skirt
4. Kate Spade licorice too neon heels

 photo madebygirl2_zps39fc8c8c.jpg


-post by carlinn


Google+ Pinterest

Food: ChickPea Fries

Hi MadeByGirl readers! Its Teann from Teann Ingram Photography. Whenever I go to a restaurant, I always walk in thinking, I'll try a new item on the menu. But when the waitress comes to take the order, I panic and go with something classic instead. Last week, I actually tried a new item! Chickpea Fries, which I fell in LOVE with. 

They are somewhat healthier than regular potato fries, though they are normally deep-fried so I think that might cancel out the "health" factor. Luckily, you can bake these fries too!


You can buy chickpea flour from a specialty store (I've heard Whole Foods has it in bulk) or grind dried chickpeas in a coffee/spice grinder, like I did here.


Remember to slowly sprinkle in the flour mixture while whisking constantly to avoid clumps. Switch to a wooden spoon and continue stirring until the mixture starts to separate from the walls of the pot.


While the chickpea mixture is cooling in the fridge, make the curry aioli. Make sure to SLOWLY add the oil to the egg yolk. This is the most crucial part.


Oh yum, look at the colour of those fries!

Now enjoy!

Chickpea Fries
1 cup chickpea flour, sifted 1 tsp salt 1/4 tsp pepper 1 tsp smoked paprika 1 1/4 tsp turmeric 2 cups water 2 tbsp olive oil Favourite oil for frying (I use peanut)

Curry Aioli *Note: This aioli contains raw egg yolks.
3 egg yolks pinch of salt pinch of pepper 1/2 lemon 3/4 cup lightly flavoured oil (I use safflower) 3/4 tsp turmeric 1/4 tsp cumin 1/4 tsp coriander

1. Grease an 8x8 square dish, set aside. Mix water with olive oil in a medium saucepan and bring to a boil. Meanwhile, whisk together chickpea flour, salt, pepper, paprika, and turmeric in a large bowl. Once the water is boiling, gradually add the flour mixture, whisking frequently to avoid lumps. Switch to a wooden spoon and continue to stir for about 5 - 7 minutes, or until the mixture separates from the sides of the pan. Pour mixture into the greased dish. Smooth and level with a wooden spoon. Set aside to cool for 10 minutes before placing in the refrigerator.

2. *If using the oven method, preheat oven to 425˚F. While the chickpeas' are cooling, its time to make the aioli. You can certainly whisk by hand, but its takes quite an effort. Instead, I use my KitchenAid mixer. (You can also use a blender or a food processor). Place the eggs in the bowl with the whisk attachment. With the mixer on high speed, SLOWLY add the oil to the eggs, one drop at a time. Wait for the oil to be mixed with the eggs before adding the next drop of oil. Continue this process until the eggs lighten in colour and the texture starts to thicken slightly. Once you have hit this stage, you can start pour the oil in a thin steady stream until all of the oil has been added. Add the rest of the spices and mix well. Store in the fridge until ready to serve.

3. Heat 1 inch of oil in a skillet over medium heat. Cut the chickpea mixture into strips, about 4 inches long and 1/2 inch wide. Fry strips on both sides until golden brown, about 3 minutes per side. Remove from oil and drain on paper towels. Place fries in a warm oven, while frying the next batch. Serve immediately with curry aioli.

*4. Line baking sheet with parchment paper and place chickpea strips, leaving 1 inch space between. Bake for 18 - 20 minutes or until crispy. Serve immediately with curry aioli.


-post by teann ingram

Google+ Pinterest

BOZ + LOVE

Graphic tees have been a huge trend lately, and I came across this Australian brand, Boz+Love, and are obsessed with their line! They use words to remind us of the things that are really important in life! And how cute are the handwritten fonts? 

Oh and let me tell you, these are the softest t-shirts I've ever owned, thanks to the super Eco-friendly fiber, Tencel. Here are a few of my favorite tops, but they also carry dresses & totes! Take a look here!

Google+ Pinterest

Fashion: Festival Fashion

Hi lovelies! Its Carlinn here from Superficialgirls and I am getting ready for the festival season! Get out your cut-offs and maxi dresses, your boots and flower crowns and be ready for some seriously chic music festival style. Its your chance to be quirky and let your personal style show so be creative!

I love the mix of floaty feminine dresses paired with utility jackets and boots and if you always wanted to wear tie dye, now is your chance. Online you will find loads of stores with dedicated festival wear sections so you don't have an excuse not to go wild.


Here are some festival outfit essentials:

1. Funky sunglasses like these round ones from Asos
2. Denim shorts are always a go to when the weather is hot, we love ones with a bit of color from J Brand
3. Pile your arms with bracelets and let them jingle while you dance for a festival feel
4. Floral headbands make a statement and people might even mistake you for Lana del Rey
5. Flat booties are essential for dancing in the dirt!


Images via Pinterest

-post by carlinn


Google+ Pinterest
Related Posts Plugin for WordPress, Blogger...