Hi MBG readers! Jana here today to share a DIY gift for the gourmand in your life - Jen, maybe perfect for your chef hubby?
I stumbled upon the inspiration for this herb wreath when passing through the Tribeca Greenmarket one beautiful fall weekend. I love fresh herbs & have quite a few foodies as friends. They have cooking gadgets galore but, as far as I know, herbs at the ready are a gift any chef would greatly appreciate. The genius of this gift is that when the wreath dries out the herbs are still recipe ready.
Materials:
Herbs (I used Dill, Rosemary, Oregano, & Lavender) (my friend I am gifting this to makes wicked Lavender ice cream!)
Twine
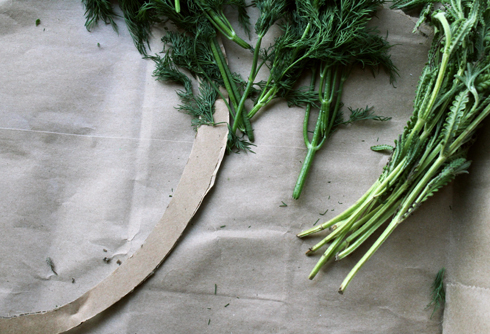
Cardboard
Cut the cardboard into a circle. I traced a 12" dinner plate then cut out the inside for a rough 1/2" edge width.
Using the twine, tie your herbs into small bundles. The bundle should be not too small, and not too bulky. About 5" long with a 1 1/2" width at center of bundle is a safe starting place.
Tie first bundle onto the cardboard ring.
Now, add bundles by tying successive herb bunches 2" under its preceding bunch (to reduce the amount of visible twine). Alternate herbs. I tied on two bunches of an herb type before I switched onto a new herb.
Once all bundles are tied on, wrap twine over the sections where two bundles overlapped and tie off. This thicker section of twine is a decorative way to secure the herbs in place.
I finished my wreath off with braiding the twine into a loop and securing to the wreath for ease of hanging in the kitchen.
Voila, an herb wreath at the ready for the chef who has everything. (Or the hostess that may have forgot that final sprig of rosemary!)
Do you have someone that might relish in this wreath? We would love to know!